Over the past few months I have been off enjoying the summer holidays, and taking this time to start or finish many projects that I have been wanting to work on for a while. This has included a flight control board, as well as a couple of lighting projects, and designing a 3D model for a new CNC. But anyway, more on the lighting; doing some research around the web, and thinking back to my day out at design junction in London last year, I decided I wanted to make a few industrial looking light installations for my room. The first of these would be an old fashioned marquee letter, and secondly, a floor lamp made from galvanised conduit.
Marquee Letter
This was a fairly simple project, all be it a rather time consuming one! I started by drawing out the letter on the piece of 700×500 Chipboard I had cut to size. This outline was then cut out by hand using the jigsaw. I then finalised where all of the light bulbs would go, using a 28mm flat drill bit to cut out all of the holes. once this step was done, I then took to the back garden, and gave the front of the letter a few light coats of white spray paint. The next step, was to prepare the edging strip. For this, I used a garden lawn edging strip, this came in a galvanised finish that would match the floor lamp perfectly., but there was one main issue… The roll was wavy, and crimped along its length. This led to some gruelling hours hammering out the waves, and bending the strip back to a straight flat one. Once this was done, I used a piece of scrap wood as a template and draw on a offset centre line that would be used to ensure nothing was wonky – this was aligned with the back if the chipboard when pinning it onto the letter shape. I used small 25mm nails to attach the sheet, having one about every 25mm to give a nice almost riveted effect. To finish off with, I placed the lights through the oles, using some sticky foam pads to give them some adhesion in the holes. Then all that was left to do was to turn it on!
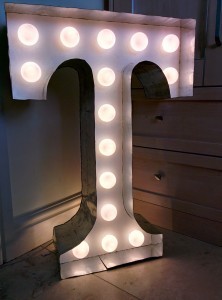
Here is a photo of the letter lit up.
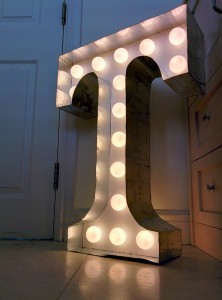
Here is a photo of the marquee letter lit up, from the floor.
Floor Lamp
for this aspect, I wanted to again bring an industrial feel. I started by making a square mould for the base, which would be filled with concrete (well, just cement and water) and a three way 20mm galvanised conduit box sunk into it. This was aligned with one edge, giving a route for the cable to exit. Once this had cured, and was released from the mould, I cut some 20mm conduit into 2 lengths of ~1000mm and 1200mm. these were then threaded, and the longer one bent 180deg. this provided an arch for the pendant to hang from. The next step was to get the lamp fixture ready. I decided I wanted a festoon cage design, but the lack of and price of a metal cage in the UK made this difficult. Therefore, I decided just to buy a cheap plastic one, which was then [painted in black and white spray paint, I finished off with a patchy coat of black paint to leave some texture showing through. I also painted the light fixture itself in this way. Finally, I wired up the whole unit, making sure the main steel body was correctly earthed, and using some red braided flex I had made. All it needs now is for the ‘Antique’ squirrel cage bulb I have ordered to arrive!
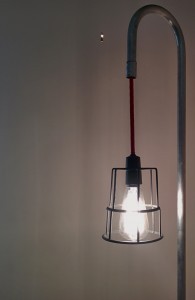
A photo of the top half of the lamp, with a squirrel cage bulb fitted.
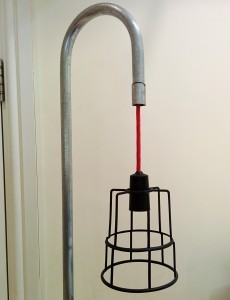
A photo of the top half of the lamp, including the lamp cage
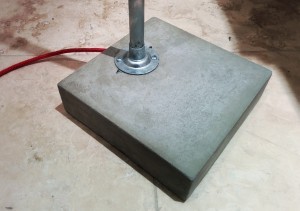
A photo of the Lamp base including red flex cable